
Summer ke mausam mein, Mango Smoothie ek aisa refreshing drink hai jo na sirf taste mein laajawab hota hai balki health ke liye bhi faidemand hai. Mango, jise aam bhi […]
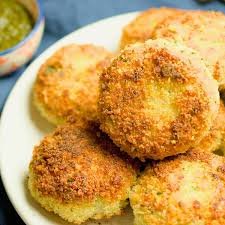
Potato Cutlets Recipe – Crispy Evening Snack
Meta Description:Learn how to make crispy and delicious potato cutlets at home with this easy recipe. Perfect as an evening snack or party appetizer. Step-by-step guide included. Introduction Potato cutlets, […]

Cheesy Lasagna Recipe – Italian Style Comfort Food
Lasagna is a timeless Italian classic that has won hearts all over the world. Bursting with layers of tender pasta, rich tomato sauce, creamy béchamel, and gooey melted cheese, this […]

Fresh Fruit Salad Recipe – Healthy Dessert Option
Looking for a refreshing, nutritious, and easy-to-make dessert? A fresh fruit salad is the perfect choice. Bursting with natural flavors, vitamins, and antioxidants, fruit salads not only satisfy your sweet […]
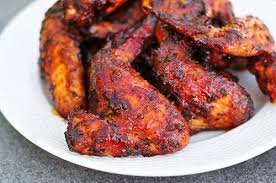
BBQ Chicken Wings Recipe – Spicy and Crispy
If you’re a fan of finger-licking delicious food, BBQ chicken wings are the ultimate treat. Perfectly crispy on the outside, juicy on the inside, and packed with spicy smoky flavor, […]
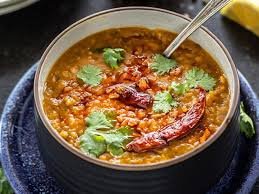
Traditional Daal Tadka Recipe – Simple Indian/Pakistani Dish
Daal Tadka is one of the most beloved and comforting dishes in Indian and Pakistani cuisine. Known for its rich aroma, flavorful spices, and wholesome taste, it is a staple […]

Soft Pancake Recipe – Perfect Breakfast Idea
Introduction There’s nothing quite like waking up to a stack of soft, fluffy pancakes. A perfect breakfast not only energizes you for the day ahead but also brings a sense […]
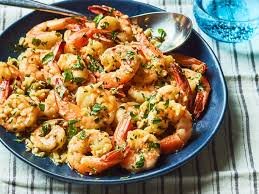
Garlic Butter Shrimp Recipe – Quick Seafood Dish
Introduction Seafood lovers ke liye shrimp ek aisa ingredient hai jo har kitchen me easily available hota hai aur jise banane me zyada waqt nahi lagta. Agar aap quick, flavorful, […]
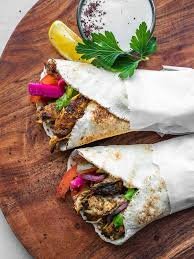
Chicken Shawarma Recipe – Street Food Style Wrap
Meta Description (SEO):Discover the ultimate Chicken Shawarma recipe to make delicious street-food-style wraps at home. Easy, flavorful, and perfect for family meals or quick bites. Introduction Chicken Shawarma has become […]

Crispy Samosa Recipe – Perfect Ramadan Snack
Meta Description:Learn how to make the perfect crispy samosas this Ramadan! This step-by-step recipe guide covers ingredients, preparation, frying tips, and serving suggestions to make your snacks irresistibly delicious. Introduction […]